The All Terrain Vehicle, a >30kg iron colossus
The All Terrain Vehicle (A.T.V.) is my biggest and most time-consuming project to date. In its building process I have learned welding, working with metals and plastics, as well as how to plan and build complex metal structures. Even more, I improved my skills in circuit board design, programming and circuit board etching.

I started the A.T.V. project in April 2012 together with a friend. Our dream was to build a tank that could shoot firework rockets and BB-pellets. After a week of brainstorming we realised that we had very different visions of how the vehicle should be built. So we both planned or own robot. This increased our teamwork, as we didn’t fight about details, but rather help each other out with problems. I was the electronics guy while my friend was the man for the hardware, so together we had a great knowledge base which was mostly fuelled by practical experiences.
After the brainstorming phase was finished we started welding the frame and bought more square iron rods than the home improvement store could restock. Then we went to various bike shops around us to dig through their metal scrap. This way we spent 0€ on many pounds of bike chains and gears which we direly needed. With the iron rods we built the frame and the chains were repurposed as tracks. But the longer I was working on the tanks tracks, the less I was convinced of them. Their big disadvantage is that when vehicle is turning, large stress is put on the axles. These become maximal when the robot is turning on the spot. I didn’t trust my axles to withstand that, so I bought nice, thick Rubber wheel-barrow wheels. These had a greater diameter than the driving gears of the tracks, which meant that the robot would reach a higher top speed. Also, as the wheels were air-filled, they reduced vibration and driving noise which was a benefit for the electronics and the overall appearance of the tank.
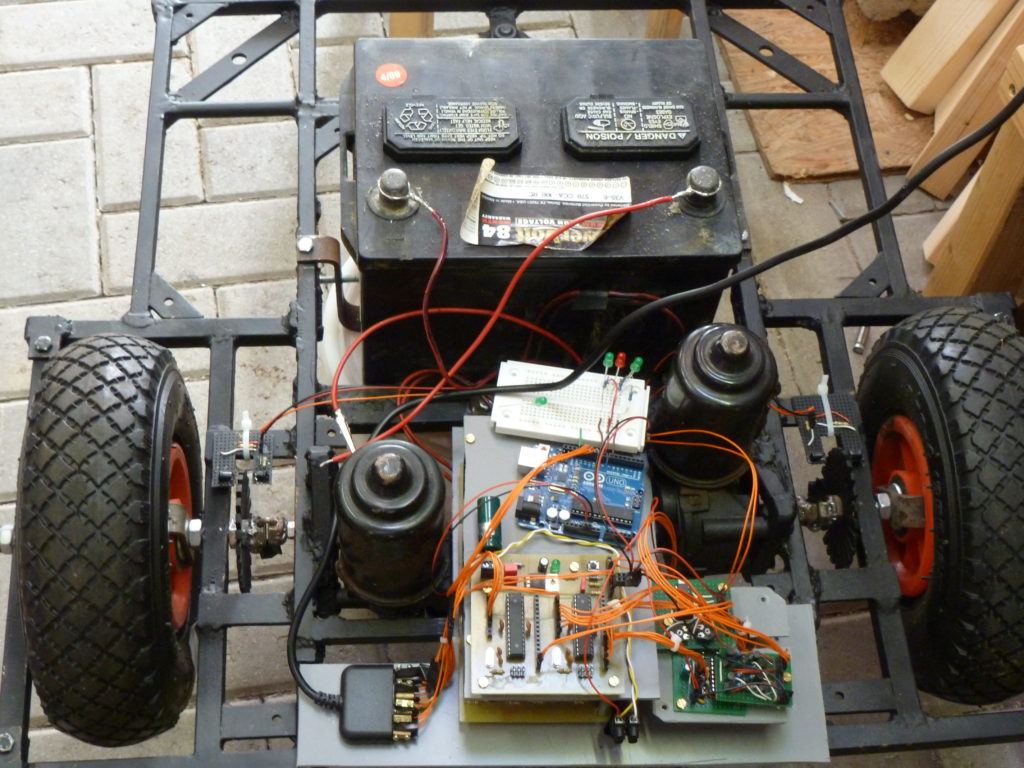
The next problem was to get cheap and strong 12V Motors that would suit our cause. We looked around a bit and found our winner in the car-junkyard – windshield wiper motors. We got 4 Motors for 20€, they ran on 12V and they were strong enough. The downsides were that the motors aren’t very efficient and that they turn a bit faster in one direction than in the other. We put 2 Motors in every robot, one for every driving side (left and right). Then we plugged them in to a 12V lead acid battery and had our first prototype: A flat, moving piece of metal construction.
After this fresh boost of success, we tackled the top frame, as every vehicle needs a body. This frame was much more complicated to build than the bottom one. Not only did you have to cut the rods to the exact length and weld them, you also had to bend them and make sure everything fits on to the bottom frame. For the outer body I chose to use plastic sheets, which also had to be cut and riveted to the frame. For protection of the sides I added aluminum corners.
After me and my friend both had the body of our tanks finished we spent two days painting them.
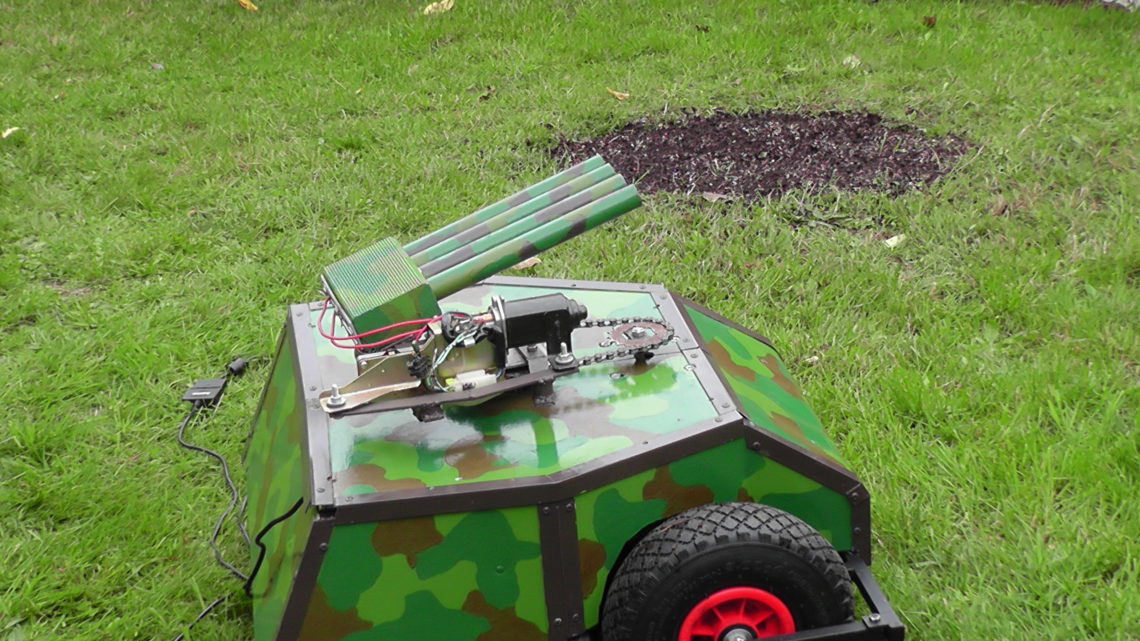
The turret is the crown of the robot and took the most time to design. It sits in the middle on the top of the vehicle and sits on a ball bearing. This bearing used to be a shopping cart wheel, of which I cut the entire “wheel” part off. A windshield wiper motor drives a bike chain, which runs around a sprocket mounted on the turret, turning it. Another, smaller motor sits on the turret and sets the shooting angle.

For cannons, you can choose between “firecracker cannons” and “rocket launchers”. Firecracker cannons are just metal pipes which fit firecrackers. The rocket launcher is also just a thin metal pipe in which you put a firework rocket. The firework’s fuses are then lit with a glowing wire extracted from an automotive cigarette lighter.
When the cannon is lit, the firecracker bursts and propels payloads up to 120 feet far. When the rocket launcher is lit, the firework rocket flies in the direction it is pointed at.
During the entire build time I was constantly designing and improving the electronics. In the beginning, the electronics consisted only of a couple switches with which you could turn single motors on and off. Version 2.0 was a circuit board taken from an old RC car, with the motor outputs connecting to relays which were capable of switching the higher currents of the windshield wiper motors. Around this time I started etching my own PCBs. At first it didn’t work out very well, but with time I gained experience and even made a tutorial for the process (link to the tutorial).
The final electronics consisted of two atmega328 microcontrollers which took commands from a PlayStation 2 controller and controlled h-bridges with PWM signals, as well as switching the relays for the cannons. With the exception of the PS2 controller library I wrote the entire C-Code myself. Here is where I found the PS2 library.
Me and my friend were thrilled of the final result. It was like playing video games! With the left analog stick you controlled the drive motors, with the right analog stick the turret and with the bumpers you could light the cannons.
After a year of building we were satisfied with our creations and officially ended the development of the A.T.V., even though there would have been much to add. A couple of months later we took part in “Jugend Forscht”, a competition for young inventors. We got a lot of attention and went home with a prize for best interdisciplinary project.
Now the robots are tucked away in our garages and once and a while I dust mine off to reminisce.